Pages

Thursday, 31 July 2014

3 Free Tools to Edit Images Online

Today a lot of people uses social networks and their status updated with photos, for that reason has quite popular image editing (photoshop gimp, photoscape, etc), but sometimes the lack of knowledge or lack of ability to keep us from our computer to do the task.


Fortunately in the network can reach a lot of image editors, responding to the demand of users grows daily. Most of these tools allow editing easy, free and original, these editors can be used by anyone, creating wonderful results without much effort. These images not only can use to share on social networks, you can also use them for your site or as postcards

3 Free online Photo Editor tools

Photobuket:

One of the best known online services and used throughout the web, not only because it lets you edit your photos but also offers a storage service for usuarlas thereof at any time. How to edit photos has changed dramatically since it looks much more professional and lets you edit photos easily, but if you want you can use the editor Avaz.

Scrapee.net

With this service you will fall in love with digital photography and learn to make photomontages. Scrapee.net gives you the ability to create stunning photo montages, add borders, adjust brightness and many other effects, all quickly and easily. Undoubtedly one of the best websites to modificiar your photos and images online.

Phixr

You are in an Internet cafe, on holiday and want to send to your family or friends the photos you took at the beach with your digital camera but have problems that your photos are great, or however you want to add a border to any of them and computer that they do not have photoshop, gimp, or even Picasa!. Do not worry Phixr comes to the rescue!

With Phixr can edit your photos in many ways and send them directly to friends or upload them to your account in the following third party websites: Facebook, Flickr, ImageShack, Livejournal, MySpace, Photobucket, Picasa Web Albums, SmugMug, Twitter, Web , Webshots ... and more! You will not regret using it, also because of the high demand for this service user is updated very often and implements new features.

Besides the above we can add as many more tools for PicMonkey considered the successor of Picnik. We hope you enjoy these tools and if you know more feel free to share them with us.

How to Configure the Keyboard for Android Smartphones

One of the disadvantages of a mobile phone is to use the keyboard. In a short space, it is impossible to have a comfortable keyboard. Fortunately, cell phones include a dictionary making suggestions during the writing of the word.


Therefore, although some comets incomplete or incorrect write text, selected appropriate suggestions can be a reasonable writing speed and text without excessive spelling errors.

Android, always writes a word that isn't in the dictionary of the terminal, the word is automatically added to the dictionary. Manage and eliminate his words in the dictionary, you don't want to include in the suggestions, go to Settings Language & Keyboard> User Dictionary. To add new words press Menu> Add.> Add.

If you want to delete or modify a word in the dictionary, keep the list and the drop-down menu that appears, choose publishing

Free Online Tool to Convert photos into Cartoon

Hi all. Many people like to change and edit the photos of their different social profiles, all seek to always have the most striking effects and to your photos, do something different that appealed to their friends, so today will provide an overview of Cartoonize to Convert photos into Cartoon.


Cartoonize is Easier by selecting an image (download from your PC or from a URL), choose one of the 8 available effects and click on the button "Cartoonize" now. This cartoonize site in 3 easy steps you can caricature any photo fast, free, and optionally download on your PC.

This tool also provides a desktop for Windows application, but it is paid, but you can download a free trial to test. Here is a photo with the effects of cartoons offered by the Cartoonize site.

Shutdown and Turn off your PC Automatically with Chameleon

Chameleon Shutdown is a Windows application that allows to automatically shut down the PC, and to establish control over other energy options in the system, including the hibernation, restart, logoff and so on. Although lacking the most striking interface, the program performs PDBs functions, with a main window where you stop, restart, Hibernate, Log Off, Lock buttons and the role of sleep.


How to Shutdown PC automatically with Chameleon


With an application such as Chameleon Shutdown, the user can easily determine the time when you must shut down the computer only set the timer and then click Start.
This option is especially useful when you download large files and are called the time to complete the download, if you will have to wait by the computer until the activity is completed. In addition, you can also specify a particular time of the closure of the computer.


In addition, Chameleon Shutdown offers a waiting period until running applications can be closed properly and then execute the specified action. You can also configure an automatic stop of the PC to do this is if you have been inactive for a period of time can also be set or when the CPU usage drops to a certain level.

Once the settings have been made click Start, and then close the application. With that, Chameleon Shutdown is reduced to a minimum in the system tray and can be accessed at any time.

Official Site : www.chameleon-managers.com

FAQ about Windows 8 that you must Know

Windows 8 is already on the market. Users who are considering upgrading must know some things about this new operating system before starting. All you need to know about Windows 8.

FAQ About WIndows 8


FAQ about Windows 8 1 - Where can I buy?


Windows 8 is available from October 26 in physical stores or buy download on the official website of Microsoft or Amazon.

2 - How much does it cost?

For users who already have Windows XP, Vista or 7 costs $ 29.99 euros.

For users who have purchased a new computer with Windows 7, between June 2 and January 31, you can upgrade for only 15 euros.

Since January 31, the price could rise to 59.99 euros as a update DVD.

3 - What versions are available?

Basic version of Windows 8, aimed at the majority of the users.

Windows 8 Pro includes more advanced features such as BitLocker, client hypervisor, file system, supported the policy of the company or the remote desktop hosting.

RT is the Windows version for ARM-based processors, typical of smartphones and tablets.

4 - What are the minimum Requirements?

1 Ghz processor, 1 GB of RAM (32-bit) or 2 GB (64-bit), and 20 GB of hard disk space.
Read in Detail: Minimum Requirements to install windows 8

5 - What applications are compatible?

Most applications for Windows Vista and 7 must be compatible. In addition, already has more than 20,000 applications in shop app store Windows.

6 - Is Windows phone like windows 8?

They are completely different systems, one is for computers and tablets, while the other is mobile. Windows 8 has on the success of Windows Phone, but is not the same thing.

5 Free Services to Send Large Files Via E-mail

Undoubtedly one of the main problems when sending an e-mail has been the attachments, which almost always been limited to a maximum size, making many times we can not send the complete information to our destination if we know that there are alternative tools to do so. The most common was uploading files to a storage service in the cloud and then send the link to download the mail, but now we have other options.

Free Services to Send Large Files Via E-mail
Fortunately the major mail services saw this need and expanded its boundaries somewhat, besides that added supplements useful for large attachments, so let's evaluate some of them and now you will decide which is the one you should use.


Free Services to Send Large Files via Email

Google Drive

One of the most outstanding services and offer major advantages is certainly the storage service from Google, which has been linked to the accounts of Gmail users who can send files up to 10 GB with free accounts.

Sky Drive

Microsoft who owns Hotmail, the other large email services, has also implemented its SkyDrive storage service that allows the users to send up to 7GB free version, a quite appropriate choice of over 25MB to traditional which we had become accustomed.

Dropbox

This interesting tool offers a free space ranging from 2GB just to check in, to 18GB if you recommend the service to others. Available for desktop and mobile applications, and allows each of the uploaded files can be sent via email to the recipients you want.

WeTransfer

Although the service is now in beta, allows for free and without registration, anyone can send files up to 2GB to a recipient or to a group of 20 different emails, also if you prefer you can also get a direct link to download the uploaded file. Best of all, when the recipient downloads the file, we will receive a confirmation message that this was downloaded.

Filemail

This service offers for free the ability to send files up to 2GB, requires us to register and is limited in that only allows 20 downloads per file, and after three days they are deleted.

Create a WiFi Access Point (WiFi Hotspot) in Windows 7/8 Laptop

Hi all.If you have a single PC with WiFi access and if you want to share your internet connection with other devices, Winhotspot is a light and simple application designed specifically to do this. Imagine you are in a college, where they often have to go through a portal owner, and enter the username and password assigned to us. Sometimes even this key we limit the number of devices that can connect.


With Winhotspot, we could eliminate the hassle of entering the password be at all times and even connect more devices to make our laptop take the signal and then repeat it, as a new access point. 
Or suddenly have one of those USB Modems with internet, and would like to share the connection with other devices at hand. With Winhotspot, we could share our 3G modem connection via Wifi.


The application is extremely sencilal of use. Simply enter a name for the access point (such as "MyWiFi"), a password, and then choose to share the connection (local area network, wireless signal, or 3G modem). Finally, we make sure that "Hide" is disabled for the access point is visible, and then we click on Start.

I tested the application on a laptop with Windows 7 and it worked perfectly. I still have not managed to test it on Windows 8, but do not see why it should not work in this new operating system. They also have to be sure. Net 3.5 installed (usually comes pre-installed with the operating system).

Best Applications for converting speech into text

For those who spend most of their time writing on the computer is always safer to be looking for ways to improve your writing and make some time to enter information, and in this sense, the proper use of technology can be an advantage considerably to improve our work.

To enter fully into the subject, imagine that instead of writing the traditional way we are used to using the keyboard, you can simply dictate what we want our voice that are written on our computer, then just copy and paste the contents in any text editor you use (Word, Writer, WordPad, Notepad, etc ...)

These types of applications that comment very hard to find and there are many that offer a suitable solution for these tasks, so I wanted to share just 2 best applications that deserve consider work to convert speech into text on the computer.


Apps that Converts Speech into Text


Applications for converting speech into textBefore starting to use the applications that we recommend should have installed and configured a microphone to dictate to our PC, if we usually bring a laptop usually incorporated.

It is also worth noting that when people speak slowly and clearly a way for applications to be as accurate as possible, so we can see a correct transcription of our voice.

TalkTyper

This free web application is very easy to use and if we are clear in talking obtain a fairly accurate written by this tool. Choose from over 20 languages ​​we use to talk.

It consists of two text boxes. In the first we appear on the microphone saying, if we can make corrections and then move the content in the second frame, where anger arm the entire document can copy, send, share, print or translated.

Dictation online

This application is a little simpler and not have as many options as above. Simply click on the microphone to see on the site and begin speaking into the microphone, see the text appear on the screen and moves downward as it grows.

After you have all the information that is transcribed can simply copy and paste it into our favorite text editor to add the finishing touches.

How to Create System Restore Point in Windows 7/8

Hi all. Today we are going to learn how to create a system restore point in Windows 8 (Windows 7 also) . This allows you to record the computer's current settings stored in the Windows registry. In this way, we can go back when you install a program and something goes wrong.

Create system restore point in Windows 7/8

Creating a restore point in Windows 7 is very easy and it will not take more than 1 minute to do. Follow the steps below to perform a system restore point:


Click the Start button and in the search field type "Create a restore point" and click the appropriate command.

In the next window, click Create.

Enter a name to identify the restore point of Windows 8/ (and avoid confusion when restoring) and click Create.

Now it only remains to wait for the process of creating a restore point finish.

How to Remove Applications from Homescreen in Windows 8

Hi all. Today we come here to show you a little trick to remove the applications from the home screen on windows8 , which can be annoying to some and comfortable for others users. The truth is that these applications are designed for use on touch devices and use on a daily basis may not be entirely satisfactory.


Remove Apps from Homescreen in Windows 8


This little trick is as follows:

1. Login your windows with Administrator mode.

2. To access Powershell write the following command as is:

Get-AppxPackage-AllUsers | Remove-AppxPackage

3. With this command we can eliminate them completely, but we can retrieve them later if we are downloading from the Microsoft Store.

List of the best free online antivirus

Hi all. Sometimes ago i had posted something about best antivirus for Android. Now i am going to post about best online free online antivirus. The online scanner is the perfect method for those who do not want to install a full security suite on your computer, and also are the perfect complement for those not completely rely on the antivirus you have installed and want to have a second option without sacrificing system performance.


best free online antivirus


In the network we can find a variety of free security solutions to scan and analyze our system for threats, even many of the most popular antivirus have developed an online version to offer alternative support, so let's see some of the most recommended.


10 of the best free online antivirus

  • Virus Total
  • Panda ActiveScan
  • Bitdefender QuickScan
  • Metascan Online
  • ESET Online Scanner
  • Symantec Security Check
  • avast! Online Scanner
  • F-Secure Online Scanner
  • CA Threat Scanner
  • Dr.Web online scanner

All these tools you can use to analyze links, files, or your entire PC. Most do not ask to install anything on your computer, even need a small plugin or add-on, but rest everything is online and from your browser.
I hope these are helpful online antivirus for everyone, and if they know other feel free to comment.

Download Battery booster for Android & Increase your battery Life

Hi all. Battery booster is a new Android application that's now available for free download that lets you increases you battery life for Android mobile phone by 17%-30% .

This Android application is very useful for Android user. Personally I use this battey booster application. Its really working pretty good.


And also this app automatically recognizes your Android phone and sets up the best battery configuration for you.

This battery saver application's algorithm will run and automatically disable battery-sucking features of your Android when you aren't using them.

For example, this app will disable WiFi when you are not using WiFi on your device. It's also include some other features. That are live wallpaper (if you set), wifi, 3G, 4G, bright screen, and network Services.

How to Use Image Password Function in Windows 8

Microsoft has made ​​a big deal earlier this month about the new authentication method on Windows 8, which refers to the picture password feature for its next operating system.

The official blog of the developers of Windows 8 has dedicated not only one but two articles referring to this development.

In Windows 8 will be a new system that will allow users the option with the help of a motion picture on the touch screen to create what Microsoft calls "system strong password", if used correctly.

Is this Security or vulnerability??


The new system of passwords and security of images is a factor. According to technology website reports NetworkWorld.com, detailing the SecurID system creator of the two factors, the picture password feature of Windows 8 "is just cute", but if you look from a security standpoint, could have several problems later.

One of the main problems of this system according to Weiss, is that current video cameras can capture a person making movements necessary to unlock Windows 8, even from a distance.

While in a normal password system, people on the screen are replaced when the user points, making the act of registration of shares in connection with a video camera, is much harder.

How to Improve Android Display Resolution Easily

While the software changes in android devices coming daily likewise its also true for hardware.Apple has upped its iphone and ipad devices with Retina Display whereas Samsung are pushing out the boat on its andriod offerings with Super Amoled. The display of these devices are very sharp and vivid. But those who are still stuck with older Android devices can add 'hi-def' look to your screen.


Improve Android Display Resolution
With Rooted Devices it is possible to alter the LCD density of the display. It is a simple hack or trick what ever you say but it involve editing certain system files.In most cases it is fine working but i still advice you to backup your rom before proceeding.

Steps to Improve Android Display Resolution

1. Install Root Explorer : There are many alternatives to alter LCD density but my choice is 'Root Explorer' as this evolves manually editing the system files, a file browser application with root access is required.

2.System Files: Open 'Root Explorer'. If a superuser access granted request pops up then allow it. Scroll down the file list and click on the System. In the next screen tap Mount R/W button located at the top then long press on the build.prop file.
3.Editing build.prop file: At the bottom of the context menu click on 'Open in Text Editor'. In the editable text file locate the line 'ro.sf.lcd_density'

4.Editing Density: Make a note of the current number and replace with a lower number. For example if it is written ro.sf.lcd_density=240 then change the number lower than this like 200( ro.sf.lcd_density=200). Some phones may start to struggle with settings lower than 200.

5.Saving the changes: Press Menu>Save Changes Root. Explorer will backup the original file while saving the modified version.The system changes need to be consolidated via Rom Manager. If you dont have it, go to Play Store and install it.

6.Fix Permissions: Open Rom Manager and select the Fix Permissions from the main menu. This process is automatic but can take upto five minutes. Once the process is finished you will be asked to reboot the device.

7.Changes in screen: Reboot the device, it may take time while the device reboots. Once the device reboots you will notice the difference in webpages,menu,icons,text etc. This things will appear sharper.

8.Tweak if needed: If some applications doesn't like your new tweaks then try installing 'Spare Parts' and untick 'Compatibility Mode'. If you wish to get back your original changes then again follow the steps 2-7. But enter the original value in the ro.sf.lcd_density line.

9.Alternatives: If manually changing the resolution setting isn't your thing then there are apps in the market like 'LCDDensity for Root' which can automatically do the work for you. But results may vary.

Caution: There are caveats to bear in mind. Play Store may refuse to install apps due to compatibility issues. Also try to stick to vanilla (AOSP) Android Roms, other variants of android may cause some issues.

For any kind of question please comment below.

6 Things to do with your Old Computer

Hi all. Fortunately there are many ways to reuse an old computer. I wanted to share here on our blog. You'll know to choose which of the following 6 options is best suited to your old PC.


Things to do with Old Computer

1. Media Center


One of the major uses for computers has given is definitely all about multimedia. Typically many of the old computers used to play audio and video, so why not use it as a home audio system or adapt the style of a jukebox musical. You can also take care to connect your PC to the computer to function as a video and film center

2. File Downloader

If you're fans to download files from the Internet, you can use your old computer as a special download center. Take care of removing all unnecessary hardware and essentially left alone to connect to the network and downloading always be what you want.

3. Install a web server, or print files home:

To do this it is best to look for ways to keep your computer always on, since the idea of ​​a server that can be accessed at any time from different computers on the network. Then you just need to connect the printer, share it and voila, you have your own print server.
You do the same with the files and you have your own file server.For a web server will need to install a package like XAMPP or AppServ includes everything you need to get to ride your web projects.

4.Test Equipment for Hardware and Software:

If you like tinkering and playing with computers, take advantage to test and learn without fear of making mistakes, because as your old PC does not have much to lose. You can install programs from you want to implement advanced techniques of modding and overclocking.

5. Children's Learning Center:

If you have children it is best that from childhood you guide in the proper use of computers, teaching you need so you can very well use this excellent tool. In this case you can try installing a Linux distribution for children that will make things easier at the time to educate them at a computer.

6. Gaming computer:

Obviously you can not enjoy the latest games on the market, but you can relive the golden ages of gaming by installing one of the many emulators consoles that can be found on the Internet.

9 Interesting Google Facts That will Amaze you.

Every day we go and use Google Search Engine. Google is very well known to all but many of us don't know about Some Facts about Google. Here are 9 Cool Google Facts that will Amaze you on reading.


9 Interesting Google Facts

    Google Facts
  1. Google name was misspelled. Originally its Gogol, Gogal is a mathematical term for a followed by 100 zeros.


  2. The simplicity of the Google home page is that its founder did not know HTML and therefore simply simplicity which finally occurred.

  3. The founders of Google, Larry Page and Sergey Brin were 23 and 24 only when you created the search engine. In addition to the value of PageRank which occupies the pages derived from its founder's Page.

  4. Google receives about 20 million of research each day. Also available in 116 languages.
  5. In the early versions of Google, there was no button to search for it would necessarily use on entry.

  6. Google has indexed about 3 billion websites. A person could take years 5707 for these searches, while the Google software do it in 0.5 seconds.

  7. Google doodles that appear on the cover page are created by Dennis Hwang, a Korean artist who resides in the United States.

  8. Google Earth to view the surface of the moon itself installing an extension called Google Moon.

  9. Google has its own satellite to capture images of Google Earth . It was purchased from the CIA in 2004.
Aren't These Facts interesting? Google is a Major Search Engine and i bet you didn't knew all of these facts earlier.

10 Possible Symptoms to Know if your PC is Infected

Hi all. Viruses are undoubtedly the worst enemy of our computer (if you use Windows), locks, unexpected reboots, loss of information, among others are the many symptoms that may potentially cause these pesky visitors. But have you ever wondered how to tell if your computer is infected, well, here I share some of the most common symptoms that can occur when a computer is affected by virus.


The 10 possible Malware infection symptoms may include:


1. My computer tells me: You are all kinds of pop-ups and messages on your desktop. This could be a spyware or a fake antivirus or Rogueware.

2. The PC is painfully slow: Although there are several possible reasons can be given if a Trojan is performing tasks that consume resources.

3. Applications will not start: It is a sign of infection, there may be just another failure.

4. I can not connect to the Internet or connect me, but sailed very slow: Malware could be making calls, and stealing bandwidth.

5. When connected to the Internet, many windows open or unsolicited browser displays pages: This is a sure sign of infection, because some threats are designed to drive traffic to certain sites.

6. Where did my files?: There are types of malware designed to erase data, encrypt it or change of site.

7. My antivirus has disappeared, my firewall is disabled: Some threats are designed to disable the security system installed.

8. My computer tells me in a strange language: Computer may be infected if you change the language of the applications or the screen turns upside down.

9. I'm missing libraries and other files to run applications: It can also be a sign of infection.

10. My PC has gone mad: If the team does things on its own, such as connecting to the Internet or send emails, perhaps the cause is a threat.

Remember if you See any of the above symptoms, Then it is mendatory to take action and Scan your pc for viruses with a Good antivirus. Reinstall operating system if needed.

Free Websites to Learn Programming Languages Online

Hello friends, After a long time I’m back for you again. Today, I will be discussing one of the most important topic for those who want to switch their career in Programming field. Really guys now a days it is not at all a big task to be a programmer, Internet is your friend, You can learn it for free. all you need is Dedication from your side.

Currently anyone can learn programming easily without even paying for it. So, If you also have a dream to be a great programmer like Bill Gates and our very own facebook owner Mark Zuckerberg then this article will be helping you a lot.

Without wasting much time I will directly come over the point. In this article I will be talking about the best 5 websites which will be helping you in learning different programming languages online for free of cost.
Websites to Learn Programming Languages Online
The websites which I have listed below in this article will teach you programming instantly with different and simple ways. Don’t fear if you are thinking about the complicated processes and setups which will be needed for learning programming. Simply pay your attention properly to the lessons which are taught to you by these websites and then by Practising nicely you will start working like a Professional.

Websites to learn programming without investing money

1. Codecademy

Codecademy is counted in the most popular websites which helps you in Learning programming languages easily and simply without any type of Complications. This website has Simple and Easy interface that will be helping you in operating this website easily. You can directly start learning the courses simply visiting the main page. This website will be teaching you the most popular languages like PHP, JavaScript, jQuery, Python, Ruby and APIs.

You will be finding Proper Explanations and Instructions inside each and every lesson you open. In short I wanna say that this website will be acting like a complete guide for you who is teaching you by sitting right beside your chair.But no need to takeaway anything from other Websites listed below. They are the Chosen ones too.

2. CodeBabes

Codebabes have recently been added to famous websites which will be helping you in learning programming easily. As the name suggests, it will be Fun if you would like to learn Coding where Babes will be there to teach you.

With Cool and Simple user interface anyone can operate this website easily without facing much problems. Like the other websites this website also offers you all type of popular programming languages in a Fun and easy way. No Doubt i would Recommend this Website. Reason: Find it Yourself.

Visit CodeBabes

3. Code Avengers :

This website is designed so creatively that it will make you love  programming. Unfortunately this website current only offers you HTML5, CSS3 and JavaScript. If you are thinking that as this website has limited lessons for you then it will not be providing you right information then let me tell you that this website will really make you fan for programming. Your programming skills will be more furnished after visiting this website.

As I already mentioned above that this website has been designed very creatively this means that this website offers you to play a miniclip game after completing each lesson which will be decreasing your stress level. Code Avengers provides you necessary knowledge which can be digested by beginners easily. At last I want to say that this website is made by keeping the Programmer Comfort in mind.

4. Code School

Code School is the next step which you should learn after completing your lessons from the above listed website. I’m saying this because this website offers you different type of courses by going into depth. You can easily work like an expert if you start going through this website. 
This website has mainly categorized the courses in 4 different paths like Ruby, JavaScript, Html/CSS, iOS. Although this website contains limited courses but trust me guys this website will surely make you Work professionally.

5. CodeHs

At the Last I am talking about that website which involves problem solving, JavaScript, animation, data structure, game design and puzzle challenges.

This website will help you in thinking that how can you solve programming problem easily. With different type of fun lessons this website will be giving you different tasks to make you problem solving capability stronger. I just say that this is the perfect website for you which will make you a real programmer.

6. TheNewBoston.org (Bonus)

If you have a Good Internet Connection and have the Desire to learn Programming then this is the Perfect place where you can Start your Coding Career. A Good Internet Connection because you will find tons of Videos about various Programming languages Created by a Guy called Bucky.
What grabbed my attention was his Style of teaching and making videos. I have personally Downloaded and Watched his Videos About Java and app development, Yeah You will find videos everything from C to java and java to Game development.

TheNewBoston.org is now Known as BuckysRoom

I hope you have enjoyed a lot while reading this article. If you have any type of doubt or confusions in your mind then do not forgot to leave your comments below in the comment box. At the last I want to say that kindly share this article with your friends…

How to Download Whatsapp for Pc With and Without Bluestacks

As you already know that whatsapp is the most famous instant messaging application which is available on all platforms. Whether you are using Android phones, windows, iPhone, blackberry or any other type of smartphone you can easily enjoy this application.

However, Whatsapp is not available for your Pc but by using some methods you can easily Download Whatsapp for Pc too, No matter which type of operating system you are currently using on your Pc.
But Before starting let me tell you that if you are willing to run Whatsapp on Pc then there are generally two kinds of methods. The first method is of installing a third party application called Bluestack which will be helping you to Download whatsapp for PC and the second method is of direct use.


 I know that you are not getting these points clearly now but don’t worry and keep reading the article you will automatically get all your answers.

1. How to Download Whatsapp for PC without using Bluestack


Download Whatsapp for PC without using BluestackWell let me tell you that whatsapp is currently not available for Pc use but you can enjoy the same service with the help of the similar application named as Wassapp.

Wassapp is an unofficial version of whatsapp which exactly works like whatsapp.

So, I have listed the following steps which will help you in installing this application carefully on your Pc or on laptops.
Step 1: First of all, Download Wassapp on your Computer and then install it carefully. 
Step 2:  After installing the application successfully on your computer open it.
Step 3: Now you have two option one of login and second is of register. If you know your Whatsapp Login details then fill the same in the login menu but if not then simply register a new account and then enjoy the service.
That’s all with the installation process. You can now easily enjoy whatsapp on Pc with the help of Wassapp and not even installing any other third party application like bluestacks or Youwave.
But If you are not yet satisfied with the above process then you can now follow one more procedure which I have mentioned below. So, Here we move to the second method.

2. How to Download Whatsapp for Pc with Bluestacks


The above method which I have discussed is good enough but if you are willing to use whatsapp on your Pc with the use of third party application so here’s how.

Download Whatsapp for Pc with Bluestacks
Running an android application on Pc is not an easily and a simple task. You must need to use an android emulator which can easily run those android application on your desktop. One of the most famous android emulator is Bluestacks which can easily perform this task.

So, Here is the correct method that you should follow for Downlaoding whatsapp on PC with the help of bluestacks.
Step 1. You will be needing a bluestacks setup which will further help you in running whatsapp on Pc. 
Step 2. After downloading and installing the setup you will now be needing an apk format whatsapp file.
You can download Whatsapp .apk format file from here.
Step 3. Simply install whatsapp after you complete the downloading successfully.
Step 4. Open Bluestacks and then click on My Apps, then click on app search widget and search for Whatsapp.
Step 5. Choose Whatsapp and then further click on it. Bluestacks will now Start downloading Whatsapp for you. Once the Download is Complete you can now again navigate to My apps to find Whatsapp been added in the list.

Step 6: Click on Whatsapp Icon to start it and Accept Terms and Conditions which will be asked.
By Accepting all type of terms and condition your whatsapp will run successfully on your Pc. Complete all the procedures like Entering your number which is asked further and then just enjoy the service…

Note that you must use the number that you have never used before for whatsapp purpose otherwise it will not work.

That’s it. Now you have two ways by which you can run whatsapp on your Pc easily. At the last I want to say that bluestacks will be needing high system requirements for running and if you get failed in installing bluestacks setup then you can even try Youwave android emulator. All the function and procedure will be Same as bluestacks.

If you have any type of questions or doubts then you can leave your valuable comment below in the comment box and if possible then try to share this article with your friends…

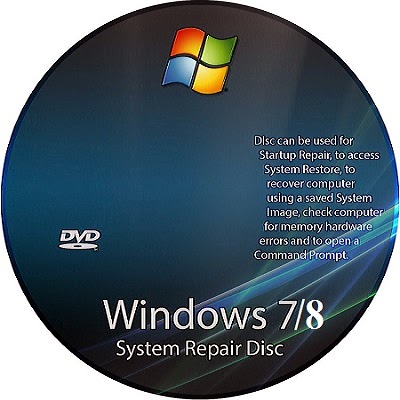
How to Create System Repair disc in Windows 7/8

If you are a Windows user then you know windows may crash anytime which results in your system will not boot. you might have faced this issue earlier and might be atlast forced to Fresh install Windows which may cause in loss of Data Stored in your Primary drive.

To avoid any loss of data and to avoid Fresh installs everytime you face a problem in windows, We can Create System Repair disc in Windows 7/8 which helps us to Repair windows Whenever Necessary. Its Very Easy to Create System Repair disc provided that Windows have an inbuild Feature to do it.
We Burn a Blank CD/DVD with the help of Create system Repair Feature so that we can insert the disk and repair our PC next time it Crashes.

Steps to Create System Repair disc in Windows 7

Step 1: Navigate to Start> All Programs> Maintenance> Create a System Repair Disc
Alternatively you can simply Search "System Repair disc" to find it.
Step 2: Now Insert Blank DVD in to your DVD Rom which, Select it and Click on Create disc Button.
Step 3: Wait a few Seconds while it Creates a System Repair disc for you, Once finished click on OK and Remove the Ready Disc.

Steps to Create System Repair disc in Windows 8

Step 1: Hover your Mouse pointer the top right Corner, click on Search, Now search for the term "File Recovery"
Step 2: Click on Settings to filter the Search. Now click on Windows 7 File Recovery.

Step 3: A New Window will pop up, From the left panel, Click on Create a System Repair Disc.

Step 4: Now a Wizard will be opened, again all you have to do is insert a Blank dvd, Select it and Click on Create disc. Wait untill it finishes the task and Click on OK

Steps to use this Disc:

So far we learned to Create system Repair disc in both Windows 7 and 8 but if i don't Cover how and when to use this disc then this tutorial will be incomplete.
You may Use the Disc when and where your System Crashes and refuses to boot. In such situations you can pop in this Disc and boot through it and enter the Windows set up Where you will find many recovery options that will help you to Repair your PC.

How to Restore Deleted Whatsapp Messages from your Smartphone

Hello guys, Today I will be discussing with you a very important trick by which you can easily Restore deleted whatsapp messages. We all know that whatsapp is the most popular instant messaging application available for our smartphones. Every other person in the world is using whatsapp for communicating with friends, relatives and  family.

As you all know that touchscreen devices are just awesome but sometimes they can be very annoying. With one wrong touch everything can get easily erased. Let me put a situation for you. By touching a wrong option you can easily delete your all important conversations available on whatsapp and then what will be your next step?

How to Restore Deleted Whatsapp Messages

Many among us know that how to Recover deleted whatsapp conversation on their smartphones. But for those who are not knowing about this trick, today this article is specially for those guys only. Below I have separated the Restoring process in 2 simple methods.
  1. With the Help of Manual Method

  2. Doing it by taking help of web applications
So, without taking much time let’s move over the first method that is of by recovering whatsapp deleted conversations by manual method.

1. Manual Method

There are very less amount of people who know’s that whatsapp creates daily backup of all the data at the system time i.e, at 4 a.m. These backup’s normally get stored in the SD card. So, if you are searching for how to get back deleted messages easily then carefully start following the below listed steps.
Step 1. Firstly, Open your SD card and then go to WhatsApp > Databases.
Step 2. After opening the Databases Folder you will see your conversation backup files which are like msgstore-2014-04-05.1.db.crypt. These files are not given these names simply but if you see carefully then you will notice that these files consist dates.

Step 3. In that folder you will see that there is one file named as msgstore.db.crypt, You have to simply rename that file by adding a word in front of it.
Step 4. After performing the above steps carefully, search for the file which shows you date before you have deleted your conversation.
How to Recover Deleted Whatsapp MessagesStep 5. After finding that file, rename that file to msgstore.db.crypt.
Step 6. Now go to Settings > Applications > Manage applications > Whatsapp and then clear all the data. 
Open whatsapp again and then choose the restore option which will be automatically be shown to you as you open the application.
That’s it. You have now all your deleted messages which are not actually deleted from your phone. 
So guys, this one is the manual method now let’s move towards the next method. Keep reading this article and find out.

 2. By using Web Application

By seeing the name only you all guys came to know that we will be taking some online help for Restoring deleted chats. Exactly, In this method we are going to take help of a web application which is know as Recover messages. Recover messages is an online application which is specially designed for such incidents only. You can use this service absolutely free of cost.
But the next question rise is that how to operate this website ? Just start following the below steps and Resotre your conversation on your smartphone back.
Step 1. Go to http://recovermessages.com/ and then click on select SQlite file to upload your database file.
 Step 2. Select The Database file which you are willing to recover from your SD card.
Step 3. Then simply Accept the terms and conditions of use and then click Scan.
Now, wait to a minute and then you will be shown all your deleted whatsapp conversation again back on your smartphone. So, isn’t this method simple for use.

Hope, you have now get the exact and simple solution for your problem. If you have any type of doubts in your mind after going through the above article properly then you can leave your comments below in the comment box and at the last do not forgot to share this article with your friends… :) 

Trick to Publish Audio Comments on Any Facebook Status Update

Today I found an interesting Chrome Extention to Publish Audio Comments on Any facebook status update of your choice. Yeah, this is a new Trick that not many facebook users know. You might be the 1st one to know this trick amongst your Friends. Perform this trick on your friend's Status and see them praise you.

All you will need is Chrome Browser which many of you might be already using it(I am not sure if such add on is available for firefox). And a working Microphone because you will need to Record your Voice(Comment) which you want to publish as your Comment.


Publish Audio Comments on Any Facebook Status Update

This is actually done with the help of a Chrome Extention called Talk and Comment. You can not only Publish audio comments but also Send Audio message to your friends in Facebook chat with this Extention.

How to Publish Audio Comments/Messages on Fb

The trick is actually very simple and i will try my best to make you understand with Simple Steps. So lets get Started.
Step 1: Open Google Chrome Browser. If you do not have it installed then Download > Install > Open.
Step 2: Now Download and Install Talk and Comment Extention from Google play store.
Step 3: If you have installed any Extentions earlier then Step 2 would be kind of No explanation needed Step. Once the extention is successfully Installed in your Browser, it will automatically open new Tab where it will ask for your permission to use your MIC. Click on Allow.
Step 4: Till now Extention Installation part is Complete, Now the real fun begins. So Login to facebook. You will see Mic Icon added to your Comment box and Chat box. if you see it then you are on right track.
Step 5: To publish your Audio comment on your Friend's facebook status or to send them Audio message Simple Click and hold that MIC icon, Now Speak to Record your Comment/Message. 
Step 6: Once you are done with Recording part, Simply Release the MIC icon to Upload the audio. You will see a Link, Press Enter to Publish your Comment or Send your Audio message to your Friend.
Step 7: Cross check by Clicking on Play icon to hear your recorded message/Comment which others will See.
Here is Official Video by the Developer of the Extention Explaining the Steps.
 
So this was a new Facebook trick i came through recently and so Decided to share with my Readers. Please understand that you need a MIC in order to Install this Extention. Take a Few Seconds to share this New Trick with your friends if you like it. Feel free to Comment about this Post in below Comment box.

Collection of Windows 8 Shortcut Keys to save your Time

Shortcut keys in Windows means We can Perform Specific Task by just pressing a key or Combination of keys which saves us time and helps us to explore more about our windows PC. We often use Basic shortcut keys, but the use is really limited to 4 or 5 shortcut keys to perform basic tasks.

Today in this article i will share Collection of Windows 8 Shortcut keys that will ease up your Task performing exerience and will save your lot of time.

Collection of Windows 8 Shortcut Keys

Windows 8 Shortcut Keys1. Windows + T - Go to first item in Taskbar, continue with arrow keys
2. Windows + U - Open Ease of Access Centre
3. Windows + X - Open Power User Commands on Desktop
4. Windows + S - Search Settings
5. Windows + P - Display Projection Options
6. Windows + O - Disable screen rotation / orientation
7. Windows + R - Open Run dialog box
8. Windows + Q - Open Windows Apps Search
9. Windows + W - Search in Windows Settings
10. Windows + M - Minimize all Windows
11. Windows + N - Create new One Note
12. Windows + L - Lock your computer
13. Windows + Shift + M - Restore minimized Windows
14. Windows + Ctrl + F - Search for Computers in a network
15. Windows + F - Search for the Files in Computer
16. Windows + H - Open Share Panel
17. Windows + B - Set focus to Notification Area
18. Windows + E - Show Windows Explorer with File’s Tree View
19. Windows + E - Show Windows Explorer with File’s Tree View
20. Windows + K - Open Device Connections
21. Windows + C - Open Charms bar
22. Windows + I - Open settings including Control Panel, PC Info, Desktop, Personalization, Help
23. Windows + J - Toggle foreground between the filled and snapped applications
24. Windows + D - Toggle “Show Desktop”
25. Windows + Enter - Open Windows Narrator
26. Windows + Spacebar - Change the Keyboard Layout / Input Language
27. Windows + Page Down - Move Start Screen to the right side of screen
28. Windows + Alt + Enter - Open Media Center (If Media Center is Installed on your PC
29. Windows + Page Up - Move Start Screen to the left side of screen
30. Windows + Down Arrow - Minimize / Restore the currently active Windows
31. Windows + Up Arrow - Maximize the currently active Windows
32. Windows + Right Arrow - Dock the current Windows to right half of the screen
33. Windows + Left Arrow - Dock the current Windows to left half of the screen
34. Windows + Minus - Magnifier Zoom-Out
35. Windows + Plus - Magnifier Zoom-In
36. Windows + Esc - Close Magnifier
37. Windows + Shift + Right Arrow - Move the currently active Windows to the right side of monitor
38. Windows + Shift + Left Arrow - Move the currently active Windows to the left side of monitor
39. Windows + Shift + Down Arrow - Minimize / Restore the currently active Windows vertically, while maintaining its width
40. Windows + Shift + Up Arrow - Maximize the currently active Windows vertically, while maintaining its width
41. Windows + F1 - Open Windows Help and Support
42. Windows + Break - Display System Properties dialog box
43. Windows + Ctrl + Tab - Toggle through Applications and snap them as they cycle
44. Windows + Tab - Toggle through all Applications
45. Windows + Shift + Tab - Toggle through Applications in reverse order
46. Windows + Forward Slash (/) - Initiate IME (Input Method Editor) reconversion
47. Windows + Shift + Dot (.) - Move the gutter to the left
48. Windows + Dot (.) - Move the gutter to the right
49. Alt + T - Cut
50. Alt + V - Paste
51. Alt + P + E - Display Open With… dialog box
52. Alt + W - Create a new document or select a template
53. Windows + Comma - Temporarily view desktop
54. Alt + S + I - Invert the selection
55. Alt + R - Rename selected files
56. Alt + P + S - Insert label
57. Alt + D - Delete selected files or folder
58. Alt + P + R - Open properties
59. Alt + M - Move the files
60. Alt + S + A - Select all
61. Alt + C + P - Copy path to the file or folder
62. Alt + A - Open the special features.
63. Alt + E - Edit selected files
64. Alt + C + O - Copy selected items
65. Alt + H - Shows history of file versions
66. Alt + S + N - Deselect
67. Alt + N - Create a new folder
68. Alt + Shift - Change Keyboard Language layout if multiple language layouts are active
69. Ctrl + Mouse Scroll Wheel - Change Size of Icon
70. F11 - Toggle Full Screen Mode


I hope you will like this huge Collection of Windows Shortcut keys, if you would like to add some more shortcut keys that may be useful then feel free to share it in Comments Box below


Trick to Use Android Smartphone as WebCam

If you do not own a WebCam, then you can now easily use your smartphone as Web Camera. If your Smartphone have good Camera quality then its even better. Web Camera Comes really handy when you wish to video chat with your friends or family members.

Use Android Smartphone as WebCam

By using your Android Smartphone as Web camera, you will even save Money and its very useful when you need a web cam urgently and your web cam don't Work Proberly.

We will Be using an APP to perform this trick. Other things you need is a USB cable to Connect your Smartphone to PC.


Steps to use Android Smartphones as Web Camera

Step 1: Download and Install DroidCam app on your Android Smartphone.
Step 2: Download DroidCam Windows Client and install it on your PC.
Install it as just you install other Softwares. it will automatically Install all the required Drivers.
Step 3: Once you have Downloaded and installed DroidCam on your Smartphone and PC, its time to connect your Smartphone to PC using USB Cable, Make sure to enable USB Debugging on your Smartphone.
Step 4: Once your smartphone is connected to your PC, Its Time to open DroidCam app on your Smartphone and the Windows Client on your PC. Click on USB icon and then Click "START"
Step 5: Thats it, now you will see the Magic On your Screen. Enjoy!!
These above steps should work well but if you find it difficult to Perform this trick then Visit this link to know more.
If you Still have any Trouble then Feel free to Comment in below Comment box.

5 Cool Windows Explorer Hacks that you must know.

Windows explorer is also known as file explorer in Windows 8. We all use windows explorer daily, there is no doubt in that. We Customize our web browsers with add ons and plugins then why not Customize Windows Explorer to make it more easy to use and efficient.

5 Cool Windows Explorer Hacks

1)Start Your Favorite Folder on Click:

Windows 7 comes with a pinned explorer folder to the taskbar which when clicked opens the Library as the default folder. If you don’t use Windows library often enough and would like to change the default folder to one of your preferred ones then you want to open on Click
  • To Start with we will Right click on the Windows Explorer from the task bar icon. A list will show up, Now again Click on Windows Explorer (File Explorer) and Click on Properties.
  • You can see a Dialog Box appears, There you Can see target path is somewhat like AppData\Roaming\Microsoft\Windows\Libraries all we have to do is change this path to your desired folder that you want to open up every time you launch file explorer.
  • As here we are going to Change it to Download Folder we will change the path to C:\Users\*Username*\Downloads. Click OK and we have successfully changed the path now.

2) Add Copy to and Move to Folder options : 

We can add “Copy to Folder” and “Move to Folder” to your Context Menu. Windows Don’t Provide these options by default but we can add with a simple Registry hack.
To add Copy to and move to  folder Option : Click here to Download Add_Move_To_Folder.reg File.
And Click here to Download Add_Move_To_Folder.reg file
These files are  small regsitry file for windows that will help you to add Copy to folder and Move to Folder option. Once downloaded, Double click on it, Click Run when Prompted. then you may be asked to click on yes and ok Couple of times.
When Everything is done, Right Click on any folder and check if its Showing Move to and Copy to Folder options. You Can see Move to and Copy to Folders are now added to your Context menu like mine.
Tip: Hold Down CTRL key , Drag and drop Source file to Destination to Copy it. And Hold down SHIFT key, Drag and Drop Source file to Destination to Move it.

3)Select using Checkboxes

Many a times we find ourselves in situations where we need to select multiple files in Windows explorer to. Suppose you need to copy multiple images or songs to a removable drive, or you want to drag and drop some songs in the play list. Most of us will hold down the Ctrl key to select these files to do the task at hand.
Well, the point here is why use two hands when it can be done using the mouse alone. What you can do it, you can enable the checkbox view in Windows Explorer and select multiple files. 
Step 1. Open Windows explorer.
Step 2. On the top navigation bar, click on Organize –> Folder and search options. Or click on View>Options>Change folder and search options.
Step 3. Now click on View tab on the top, scroll down the Advanced settings pane (where you see all kinds of checkboxes) and check the box that says “Use checkboxes to select items.” Then, click OK.
Step 4. You’ll now find that whenever you hover the mouse cursor over any file or folder in Windows explorer, it automatically shows a checkbox to help you select it.

4) Better File Copying Speed: 

Windows have made some efforts in windows 8 to improve Copying Speed. Copying FIles is better in windows 8 as compared to older versions but yet its slow and many times it Conflicts, so We will be Using TeraCopy to Takeup this task and its Fast and Effective. What it does is, it  Eliminates windows Default File-Copy Dialog  and gives us a better one.
After Installing TeraCopy, Whenever you Will Copy and paste, TeraCopy will Come into Action and do the Task for you much Faster. it also adds itself to Context Menu as an Option if in Case you prefer to Use it only when you Want to .

5) Add Tabs in Windows Explorer: 

Apple’s Finder is getting tabs in OS X Mavericks, and Linux file managers have had tabs for a long time. But Windows Explorer is still without tabs, even on Windows 8. Internet Explorer was the last big browser to get tabs, and it seems that Windows Explorer will be the last big file manager to get tabs if it ever does.
While you can replace Windows Explorer with tabbed file managers, you don’t have to switch to a new file manager just for this small feature. Third-party tools like QTTabBar can add tabs to Windows Explorer, giving you the ability to have several folders open in the same file browsing window.
All you have to do is Install it and you may be asked to reboot yur Pc. so do it to enjoy tabs in Windows Explorer.